Thursday, October 24, 2013

Trunk Transformation

    I have been trying to find a storage solution for the ever growing amount of toys in our house.  I looked into buying a nice toy box but even the cheap plastic ones are too pricey in my opinion.  A few weeks ago I went to Goodwill with my daughter to see if I could find a few good deals on some winter clothes.  I found quite a bit actually but the thing that caught my eye was this horridly ugly toy box!


    As soon as I saw it and the $12 price tag I knew I could have the toy box of my dreams!!


The top of the trunk was coming apart but I already had plans of using the leftover foam and batting from the headboard upholstery and reuse the fabric from the tee pee I made that my daughter never used.


This is the picture of the inside of the trunk turned toy box.


Here is a 3 am snap shot of me painting the trunk in the middle of the living room.  It took two coats on the inside and outside to cover up the ugly before.  This was just some paint we had leftover from another project so I am unsure of the exact color but it's basic white to me.  With it being so late and trying to get all the major work done before the tyrant princess awoke I skipped taking pics of upholstering the top of the trunk.  If you read the last post about the headboard, it's the same instructions only on a smaller scale.


I apologize for the picture quality but we are still looking for lighting solutions in her room.  With no overhead lights and a kid who likes to destroy everything she can touch we are running out of options.  If you have any ideas please feel free to comment.  And as much as I hate to admit this when I went to Lowe's to buy the new hardware for the toy box I didn't factor in all the foam, batting and material when inserting the screws.  I went crazy trying every way possible to put the toy box back together and after hours I thought I had it!!  Only to find out after her using it that the lid is broken and no longer works.  The particle board just won't hold and I'm running out of ideas.  I'm thinking of scratching the covered top and adding some trim around the top and boards down the front, back and sides to make it look more polished.  Although I really don't want to see the toys at all times and I'm so afraid of her smashing her fingers!  If anyone has any ideas or did a similar project and has any tips please let me know.  Thanks!  


Tuesday, October 22, 2013

Reupholstered Headboard

    I have been MIA for a while now because I am trying to work on my daughters bedroom.  She will be two in December and I so want her to have a big girl room now.  She slept in her convertible crib for a while but has slept in a full size bed for months now and seems to like it a lot better.  I know we have all seen many tutorials on how to reupholster a headboard so I hope to make this short and sweet and hopefully have the full bedroom reveal in a few weeks.  Please be patient with me, the lighting in her room is horrible and we are working on a fix for that.  If any one has any suggestions on what types of lighting to use (because she destroys side table lamps) please feel free to let me know!  First we will start with what the headboard first looked like......


     I found the eggshell foam for a full size bed at Wal-Mart, except it doesn't look like the old eggshell stuff I'm used to.  Here is a close up view......


   I cut his foam to fit the size of my headboard.  I wanted to make sure you couldn't feel any of the gaps in between those silver bars in the first picture.  We used the tacky foam spray on both the headboard and the foam and after a few minutes smashed them together to get a nice firm hold.  Then we took some batting and wrapped around the foam and the rest of the headboard to give a nice even and uniform look......

 This is my wonderful sister helping me on this two person project.

    Next came wrapping the fabric around the frame and making sure the tucks and folds looked as professional as possible.......

    The next part we tackled was adding the nail head trim to the front side of the head board to give it a more polished look.  We had lots of trouble because the nail heads that come with the trim were too small to go through all the layers of the fabric.  So at 11 pm we were digging for any nails we could find to help finish off the trim.  if you look close you can see the difference but not enough to bother me especially when you are looking from afar.  here is the nail head trim finishing off this headboard......


   Here are two more pics that are close ups of the nail head trim.......


    I am absolutely in love with the way it turned it out and almost wish it was my own headboard! :)
I am trying to use navy, green and some deeper yellows that I will show you in the next post I do about the $12 Goodwill toy trunk I found, can't wait!!  


Linking up here:


Friday, September 6, 2013

2014 Planner Pages and Free Printables!!

    I have finally finished my 2014 planner and would like to share it with whomever else would like to use it.
I HOPE YOU LIKE IT!


This is the Cover Page I am using and I saved it as a Publisher file so you could insert your own name.


This is what the calendar pages look like.


This is what the first page of the weekly planner looks like.

This is the second page of the weekly planner pages.


I also included a larger Notes page.

I REALLY HOPE YOU ENJOY USING THESE PAPERS AS MUCH AS I DO!!

Thursday, August 29, 2013

Diet Coke Lover Birthday Party and Free Printables

    My Mom has been drinking Diet Coke all her life-and nothing else!  So I thought it was very fitting that on her 49th birthday I throw her an appropriately themed party.  It was a small get together of immediate family and nothing too fancy but I loved how all the decorations came out because it fit her all too well. 
Since there were so few of us attending I asked her what she wanted for her birthday meal {it's something we do for every one's birthday} and she requested by famous homemade lasagna with salad and garlic bread.  That was easy enough so for desert I made cupcakes, cake balls and a mini birthday cake just for her.  I made all the decorations myself and used some leftover helium and balloons as well.  The party was a hit and I couldn't have been happier with the results!  Here are some pics of the party decorations.


    Above is one printable I have available for download in case you have someone in your family that LOVES Diet Coke as much as my Mom!  I have included the other printables I used to help make this party such a hit in the links below. I hope you enjoy them and let me know if you use them in your own party!


Linking up here:

Monday, August 12, 2013

Ice Cream Bread

    My sister and I were talking last night and she mentioned hearing about ice cream bread.  I had seen it a month or so ago on another blog and thought it was crazy!  A customer of hers had given her the recipe and after talking so long about it we decided it was so simple we would have to make it!  We had everything but the ice cream so off to the grocery store we went.  We decided if we were going to do this, we were going to do it right so we chose to get Ben and Jerry's ice cream.  This ice cream also comes in a pint which is exactly how much you need for the recipe.  I had tried the Red Velvet Cake flavor when I was pregnant and fell in love!!  My sister had tried it of course when I found out how great it was so we decided to use this flavor.  According to the directions, you can use any flavor!  So, if you have a favorite you should try it.


The recipe calls for one and a half cups of self-rising flour and two cups of any ice cream softened.


Mix these ingredients together thoroughly.


Place mixture into any pan of your choice for baking.  Place into 350 degree oven for 20 minutes.


This is what our bread looked like after baking, before we took it out of the pan.


Here is the ice cream bread after we plated it.


Here is the close up of the bread after cutting into it.

    I was very surprised at how non sweet the bread was.  We specifically chose a very sweet ice cream with chunks of icing in it but the bread tasted more like regular bread.  Only in a few bites was I able to find a hint of sweetness.  I was so surprised that it worked!  I am still not sure on why I would need to bake this in the future but I would love to hear how you used this bread!

Thursday, August 1, 2013

2013 Planner and Free Printables

    At the beginning of the year I was looking for a good planner to help me out now that I have a one year old.  I went to the http://iheartorganizing.blogspot.com/ blog and fell in LOVE with the planner she designed!!  I mean I ordered the planner and paper punch that day along with designing my own planner pages to go along with the free printables she offered.  I did mine very similar to hers because I wanted to have a cohesive design and I was trying to save as much money as possible after spending so much on the supplies.  I am a computer aided drafter so I knew I could make some myself.  Here is the link that inspired me and I hope it does you too!


   In honor of her planner I wanted to show you mine and offer you the free printables I used in case you would like to use them for the remainder of the year.  I know it's late, but better late than never!  I am currently working on my 2014 planner maretials so I will have those at the start of the new year!


This is the front of my planner when you first open it.  I chose to add some photo booth pictures to brighten up the space.  I found a template for the cover page and inserted my own text.  I use a very large paper clip to keep my place within the planner.  I store extra tabs in the front pockets in case I need them and have placed coupons and other essentials in there as well.


The next page you come to is the calendar page.  I actually printed two of each calendar.  The first calendar page has the tab attached to it so that when you grab the tab and open to that page you will be on the calendar page that you can write on.  I hope that makes sense.  These are the pages I wanted to give my readers in case they want to design their own planner.  You can find them here https://app.box.com/s/vpwhbi4yqr7eg3ph4p9o, enjoy!

After each calendar page throughout the planner are my weekly pages.  There are four to five of these pages depending on how many weeks there are in each month.  I found these free printables at I Heart Organizing and used them to help create the same color scheme for the calendar pages.  The link to these are here..... http://iheartorganizing.blogspot.com/p/free-printables.html

After the last month of the year the next tab I have is for my things to do list.  I found this free printable online a year or so ago and have been using it since.  I loved that it already fit the color scheme perfectly.  I would love to give credit to the original owner so if anyone knows please let me know.  I have this available for you to download here https://app.box.com/s/9vp4ibbk5szai84ana60.


The next tab is where I jot down my fabulous blog ideas!  This was another free printable from I Heart Organizing and can be found in the same location as the link above to her free printables.


The last tab in my planner is where I keep my contacts list.  I found this free printable over a year ago so I am unsure of whom to give credit to but again if you know please let me know so that I can acknowledge and thank them.  I have it available for you to download here https://app.box.com/s/fkh7gzj5j1ur3955xc72.


When you purchase this Martha Stewart planner it comes with a very nice clear pocket in the back.  I use it to hold everything from important documents, bills, coupons, pictures, etc.


I really liked the clear pocket that the planner came with but I needed more storage area for receipts and things.  So I took a regular pocket folder usually used in binders and used the special hole puncher to add it to the back of my planner.  The planner also has a nice pen holder on the side and has a nylon band attached to it so that when you close it you can keep it secure.  I hope this has given some of you inspiration to make your own planners and make it all your own.  When you visit the I Heart Organizing website you will see that she has some different pages that work for her needs but that I didn't feel I needed.  I have added the items I bought on the right side of my blog through Amazon if you would like to purchase them as well.  I took her advice on the pens as well and I LOVE them.  So much in fact, I'm on my second set.  I would love to see how you use the printables in a planner of your own too.  Just have fun with it!  

Linking up here


Wednesday, July 31, 2013

Tepee Project

     I have noticed so many custom tepee's on the blogs I read these days and decided to take on the challenge myself.  I started by going to Hobby Lobby and picking out my yard of fabric and then off the Home Depot to get the five dowel rods.  As usual I didn't measure anything and just eyeballed it.  I started by choosing a spot about three inched down on each rod to drill a hole.

These are a few of my supplies.

This is where I chose to drill the holes for my string.

    I already had a roll of jute string in my supply closet so I decided to use it to secure the rods together.  I started by threading the string through all of the holes first.


    Once that was done I tied a large knot at one end.  The holes I drilled were a little bigger than I intended so I had to make sure my knot was rather large and secure.  I used some hot glue as well to secure it to the rod to help keep it in place.  Next I wrapped the jute string around all the rods.  I pulled it very tight and wrapped and wrapped and wrapped.....you get the idea.  When I thought I had it secured enough I pulled the last bit of string through a few pieced that were tightly wrapped.  hen I tied a small knot and secure it with hot glue.


    I let it sit for a few minutes to let the glue secure itself while I tried to figure out how to apply the fabric.  I sadly do not own a sewing machine (wishing and hoping and praying to get one soon!).  Once I was ready for the fabric I took the rods and fanned them out to form the structure of the tepee.  I then laid my fabric around the structure trying to get it to fit just right.  My first problem was that I should have bought more fabric than I did since I don't have a sewing machine to accurately apply it to the structure.  So I used fabric glue to secure the fabric around the two front rods and then used hot glue to secure the top part of the fabric to the jute string.  Since it looked messy on top I added a ribbon around it to try to help the look of it but I am not happy with it.  I have plans to add more fabric so it has an opening that can be opened and closed.  I also want to add a bow or some decoration on the top part where the ribbon is to make it look better.  Then there is the inside where I want to make a mat and pillows so it will be comfy and cozy on the inside.  It isn't finished but here it is..............

Picture taken in the daytime.

Monday, July 29, 2013

Monogrammed Wine Glasses

    I was recently asked to monogram some wine glasses for a wedding gift.  These glasses were the ones the Bride and Groom were going to be using at the wedding for their toast.  I knew of several different ways I could achieve this by reading many different blogs over the years.  I purchased two wine glasses at Wal-Mart for .98 cents each.  These were nice large wine glasses for the price.  I already had a Cricut machine and plain contact paper to use as my stencil so all I needed now was the medium to color in the letters.  They weren't looking for them to be painted but wanted them to be frosted.  I had seen on one blog a while back where someone used the Frosted Glass spray paint to achieve this effect.  I tried this three different times trying to figure out what I was doing wrong but nevertheless this idea was a major FAIL!  I was trying to avoid buying the etching cream because I knew it was expensive and this was the only reason I would probably ever use it.  But alas, with one day left to complete the project before the big day I ran to Michael's with my 40% coupon in hand.  The coupon helped tremendously but it was still more than I wanted to pay.  After applying my stencils for the fourth time I made sure to apply a really thick and even application of the etching cream to the glasses and set my timer for 15 minutes.  Once the timer went off I just rinsed it off and TA-DA! Wonderfully monogrammed glasses!  I learned my lesson the hard way.  Instead of taking the easy route, which didn't work and put me in a time crunch I should have stuck with what I knew would work in the end, even if it did cost more.  Hopefully, you can learn from my mistake.  And now it looks like I will have lots of monogrammed gifts to give for Christmas now!


The finished etching cream glasses.

A close up of the glasses.

Wednesday, July 24, 2013

Wreath Stand


   I saw this beauty a few weeks ago on one of my favorite sites and fell in love.  Especially since I had recently been requested by my cousin the bride to be for me to make her something.  That sounds easy enough for someone who likes to craft but when you put me on the spot like that I become blank.  I decided something out of the ordinary that could be used outside the home would be fun and different.  So, I decided to tackle this bad boy.  In my true fashion I didn't read any measurements and just eyeballed it.  That is why I have only one semi-decent picture that was taken by the bride when she got it home because I forgot to in my haste to finish it with a one year old trying to help me.  I started off making it large like the picture but soon realized traveling 2 hours away with it and luggage in my car was no going to work so I had to cut the frame down.  In doing so I was left with a large bottom piece, too large for my new measurements, and time running away from me.  To offset the bottom piece I placed two blue mason jars on either side and stuck three battery operated tea lights inside each one.  The wreath in the picture is slowly starting to die even more so it looks horrible but it looked great the day I gave it to her.  I used a plain Evergreen wreath and added white roses and baby's breath.  The extras of those I had I placed inside the mason jars.  In the picture below the very top board that supports the hook holding the wreath is the only piece not visible.  I used Martha Stewart's pain in Copper Red for the entire piece except the name.  I used my Cricut machine to cut out the letters and used the off white paint for our trim and baseboards to paint in the name. Holding all of this together is my trusty liquid nails and a few screws. I hope this inspires you to make your own version as well!


Friday, July 5, 2013

ASCP Challenge Finale!

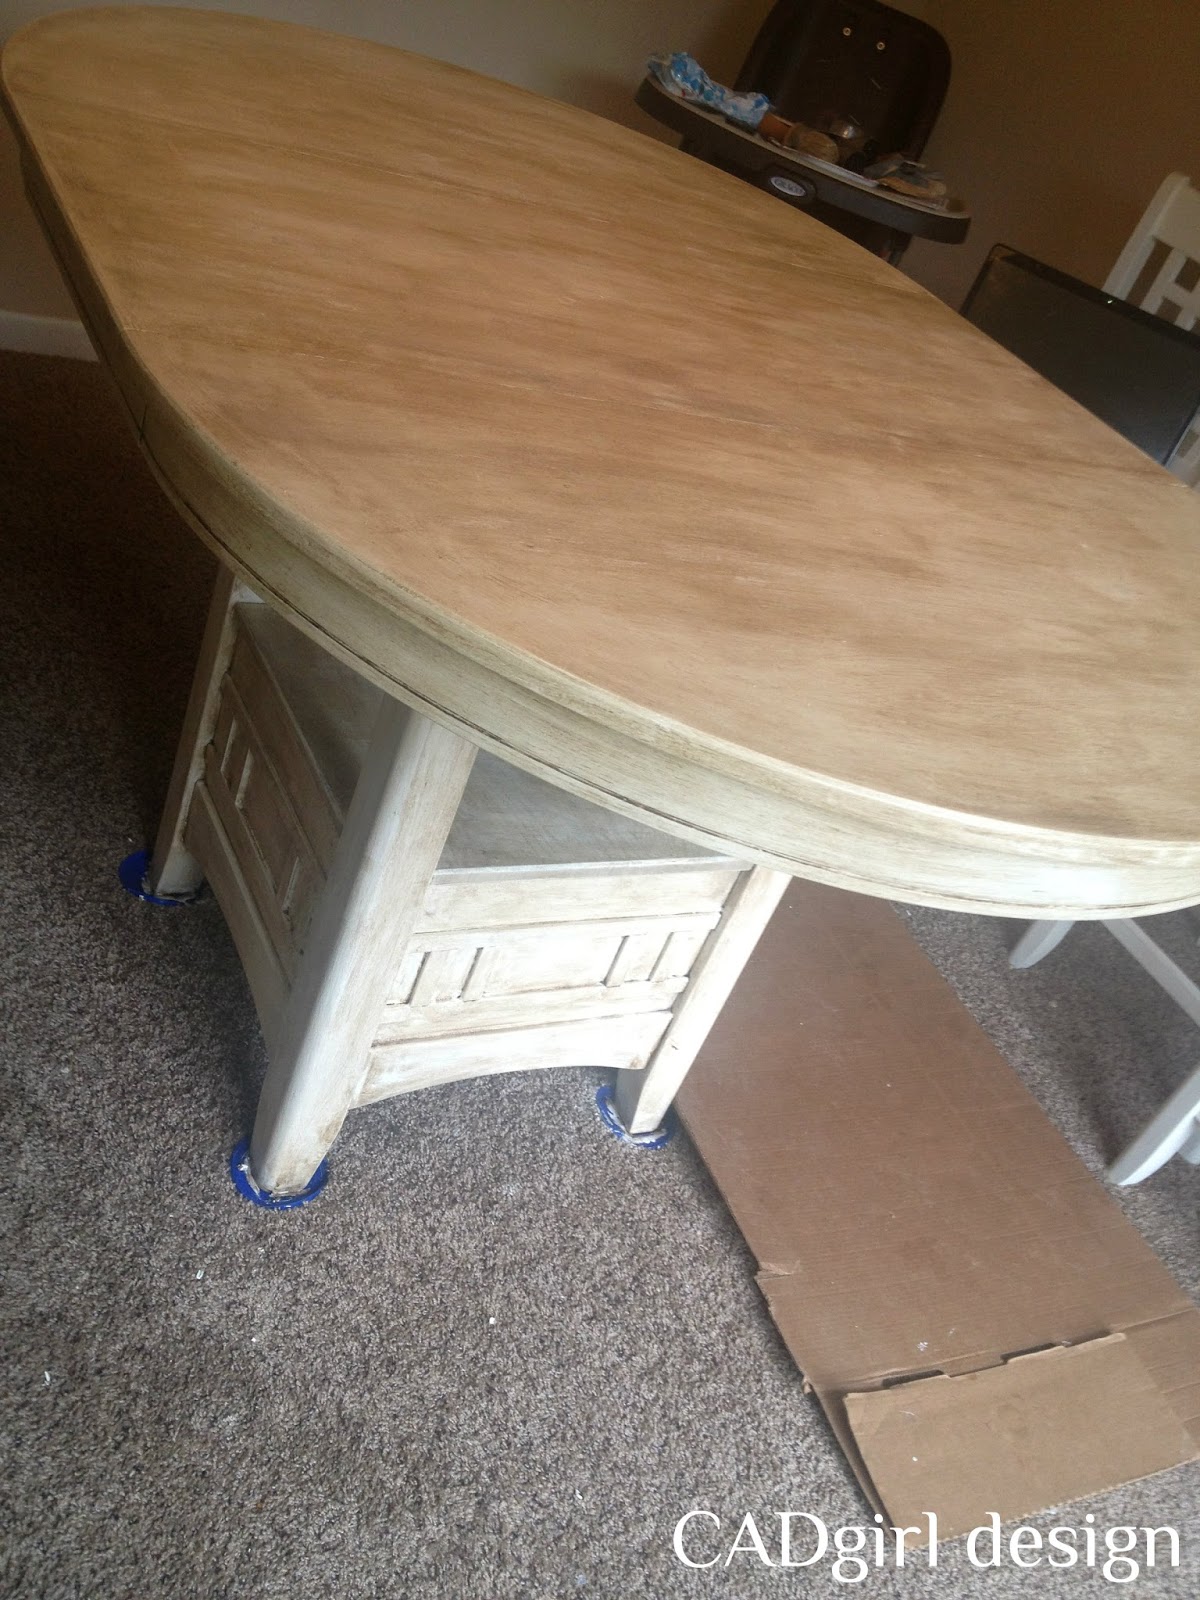
   Let me start by saying that this project ended up being bigger than I imagined and at times I hated the Annie Sloan chalk paint!  The earlier post showed all but one chair painted but after letting it set over night it looked horrible.  It was streaky, there were lots of missed places and in some places you could see the two colors side by side because they didn't mix well.  And then I looked in the cans and saw there was no paint left!  I took my brush and scrapped the sides of the can and tried to get every last drop I could to finish the messed up places but I just didn't have enough!  I will admit that it brought me to tears.  All this money and i couldn't even complete my project.  I had seen all these youtube videos where women were painting three or more pieces of furniture with just one can and I couldn't finish mine with two?!  I was dumbfounded!  After wiping away the tears and realizing I couldn't do anything about it and I was NOT going to purchase any more paint, I grabbed the clear wax and started pressing on!  The clear wax was an easy process but I didn't like the expensive brush I bought to put it on so much.  It kept leaving lots of the hairs behind so I wiped everything down with a cloth afterwards to get the hairs off and make sure everything was covered.  So I sat looking at these chairs and the table after the clear wax was put on and stared at the dark wax can.  Did I really want to put this on after the paint fiasco?!  I will admit I was terrified of this process but I opened the can, grabbed a brush and got started.  It was easy to do but very messy!  I went through four or five cloths wiping the wax off.  Here is a picture of the finished bottom of the table after adding the dark wax but the top is still just the clear wax.


   After completing the bottom half I was getting the hang of it.  I loved that you could put it on any way you wanted, how ever much you wanted and then wipe it off making it look any way you want.  It was the only part of the whole project I really enjoyed,  So here are the pics I know you are wanting to see, the finished table and chairs.


   The fabric on the chairs was changed too.  I picked it out before finishing the table and chairs and could not have imagined it matching so perfectly.  I am beyond pleased with how it turned it!!  All I did was take a cushion with me to Hobby Lobby where they cut enough fabric for me to wrap them.  I washed the fabric and then tried ironing it before putting it on the cushions but I am so uncoordinated when it comes to fabric that it kept getting wrinkled when I folded and moved it to cut out the squares for the cushions.  I thought I took pics of this process but I can't find any so I guess I didn't.  All I did was cut enough to wrap around the sides and used mt staple gun to keep it in place.  Since I'm not very strong with the staple gun I had to use a hammer most times to push the staple all the way in.  Then I turned the seat over and ironed the fabric.


 Here is the detail of my fabric.  I have a wine themed kitchen and dining area so I chose this fabric.


One last picture of the final product.  Please disregard the mess on the table, I'm trying to make a tent for my daughter.  And the chairs have to be against the wall because my daughter likes to climb on them and stand on the table!  Thanks for looking, I'm linking up here......